How To Install Commercial Grade Spring Hinges | Custom Doors
Commercial Grade Spring Hinge Installation Video with Custom Doors from Swinging Café Doors
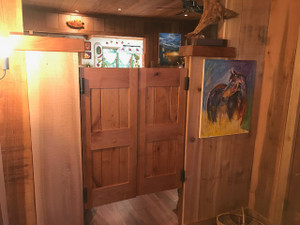
We will discuss how to install commercial grade spring hinges with saloon doors. The commercial grade spring hinges are available in a variety of finishes including satin brass, polished brass, satin chrome, oil rubbed bronze and gloss black. The hinges are being installed on Colonial Full Length Saloon Doors- custom made saloon doors. For our application we need 2- 3” Commercial Grade Spring Hinges per door.
The size and quantity of hardware will depend on the door(s) sizes. Please use this spring hinge sizing guide to help you find the correct size and quantity of double action spring hinges.
Pro Tip- When determining size for double action hinges; the door width, door weight and door thickness all need to be accounted for to determine what size/quantity of double action hinges are needed.
For this install you will need instructions, a drill, 3/32” drill bit, Phillip head bit for drill, tape measure, level and pen or pencil. We recommend to pre-drill all holes for this install and all saloon door installs. The installation process is easier with two sets of hands.
Step 1- Release the Tension
You will need to release the tension before installing the spring hinges. You can remove the tension by inserting the tension rod into one of the adjustment lugs, then turn the rod so the tension pins can be easily removed. Once you have removed all the pins, be sure to keep them, they will need to be re-inserted later.
Installing the LEFT Side of a double door or single door installation ** On Single Door Installation door hinges can be installed on either side.
Step 2- Top Hinge Install (Left Door)
To install the top hinge, you will need to measure 3 inches down from the top of the door, mark this location with a line. Take the hinge and mate the door flange side of the hinge to the door. Align and square the top of the spring hinge barrel to the mark (3 inches from the top of the door) for the proper location of the top hinge. Once the hinge is in place, mark all holes with pen or pencil. Remove the hinge and use mark hole locations- pre-drill holes with a 3/32” drill bit. Return hinge to the predrilled holes on the door and attach the hinge to the door using screws included.
Pro Note- ***Be sure to have the tension adjustment lugs up on the left door and down on the right door. If installing a single door, you can disregard this note.
Step 3- Bottom Hinge Install (Left Door)
A similar process is followed for installing the second hinge to the bottom of the door. You will need to measure 7 inches up from the bottom of the door and mark this location. Take the hinge and mate the door flange side of the hinge to the door. Align and square the top of the spring hinge barrel to the mark (7 inches from the bottom of the door) for the proper location of the top hinge. Once the hinge is in place, mark all holes with pen or pencil. Remove the hinge and use mark hole locations- pre-drill holes with a 3/32” drill bit. Return hinge to the predrilled holes on the door and attach the hinge to the door using screws included.
Step 4- Attach the Door to the Jamb
The hinges are attached to the center of the door opening. Mark a centerline on the door jamb for reference, measuring from the finished floor.
Mark the proper location for the bottom hinge. Depending on the door height and the location you prefer, the location of the bottom hinge can vary.
Take the hinge and mate the jamb flange side of the hinge to the door opening. Align and square the door jamb flange to the mark on the door opening. Once the hinge is in place, mark all holes with pen or pencil. Remove the hinge and use mark hole locations- pre-drill holes with a 3/32” drill bit. Return hinge to the predrilled holes on the door and attach the hinge to the door using screws included.
**Pro- Note- The screws included are meant for attaching directly to wood. The hardware must attach to a solid surface, please make sure the hinges are secured.
Step 5- Adding Tension to the Double Action Spring Hinges
You will need to add tension back to the double action spring hinges. You will need the tension pins we removed in Step 1. Place the doors in the closed position and wedge up until the door is plumb. Insert tension rod into the adjustment holes on the tension lug. On the left door (top hinge) with the tension holes up, insert tension rod and turn towards the left to add tension. Start with 2 holes of tensions. On the bottom left hinge one hole of tension is recommended. Adjust tension on the top hinge if the door sags or return action is too slow. DO NOT exceed 5 holes of tension on the top hinge.
Double Door Install- Right Side of Door
If you are installing double doors you will need to follow step 1-5 for the additional door. ***Carefully measure so the doors mount directly across from one another.
Depending on your application, alignment adjustment might be required. You can place shims behind the door flange to help with alignment. See these blogs for question on properly alignment and shimming procedures.
